From Method to Plugin: Building a new plugin on Windows using Visual C++
- From Method to Plugin: Building a new plugin on Windows using Visual C++
Note: This tutorial is specific to Windows with Visual C++.
Go here for a version that uses Mac OS/X.
We're going to walk through the process of making, and compiling, a new Vamp plugin based on the skeleton files included with the Vamp plugin SDK.
After downloading the various bits and pieces of code we'll need, we will start by setting up a new Visual C++ project in which we just get the skeleton plugin to compile without it doing any actual work, and then we'll add some substance to it afterwards.
This tutorial assumes the use of Microsoft Visual C++ 2008 Express Edition (free with registration from http://www.microsoft.com/Express/VC/), though it should generally apply to other versions as well.
The focus here is on the practical details of what you need to put in a plugin and how to get it to build and run -- not on the real mathematical or signal-processing aspect. We will pick a very simple method (time-domain signal power, block by block) for this example. Please refer to the [[http://vamp-plugins.org/guide.pdf|Vamp plugin API programmer's guide]] for further reading, with information about returning more sophisticated features.
1. Download and unpack the SDK headers and pre-built libraries
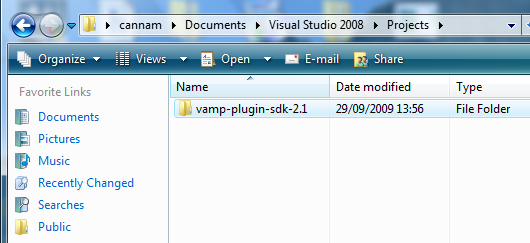
Download the Vamp plugin SDK version from the "development headers and source code" link on the developer page at http://vamp-plugins.org/develop.html -- the file you want is called vamp-plugin-sdk-N.zip where N is the current SDK version number, for example 2.3. Unpack this into your Visual Studio projects folder, which by default is found in your Documents folder, at Documents\Visual Studio 2008\Projects. You should now have a new folder in this location called vamp-plugin-sdk-N. This picture shows version 2.1, which is no longer the latest, but the principle is the same.
We're not going to compile the SDK, only draw the header files from it. To go with them, download the file vamp-plugin-sdk-N-staticlibs-win32-msvc.zip from the same location, which contains some pre-compiled SDK libraries, and unpack it in the Projects folder as well.
2. Make a new project based on the skeleton files
We're going to build our plugin in a new project called tutorial, which initially will contain the skeleton plugin code from the SDK.
There are various ways to accomplish this; here's one.
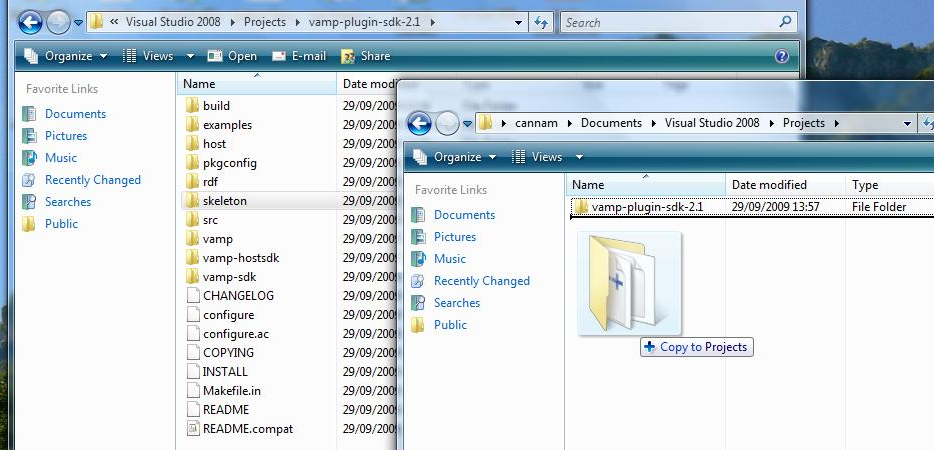
Drag-copy the skeleton folder from within vamp-plugin-sdk-N directly into the Projects folder...
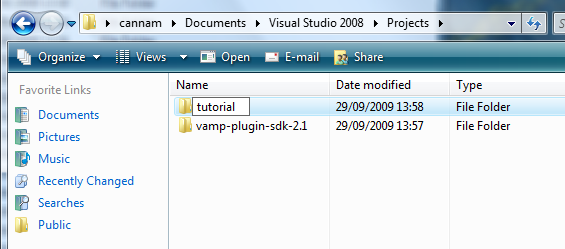
... and then rename skeleton to tutorial ...
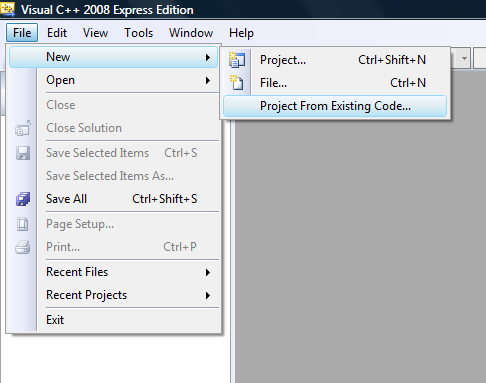
Now open Visual Studio, select File -> New -> Project From Existing Code......
... and in the new-project wizard do the following:
- On the first page, choose the Visual C++ Project type
- On the next page, under Specify Project Location and Source Files, navigate to the new
tutorialfolder in yourProjectsdirectory and Select Folder
- Under Project Name enter
Tutorial - Important: In the Project Settings page under How do you want to build the project?, select
Use Visual StudioandDynamically linked library (DLL) project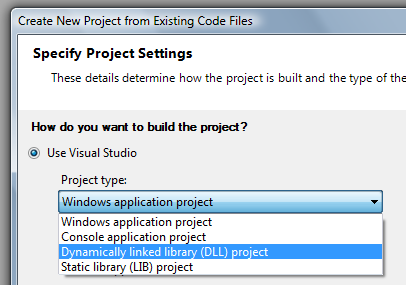
- Important: In the Configuration Settings page under Include search paths (/I), type
..\vamp-plugin-sdk-N - Finish
Now save the project (Ctrl+S or equivalent). Once the project has been created, we still have a couple more properties to set. These are found in the Project -> Properties window:
- Under
Configuration Properties->Linker->General->Additional Library Directories, navigate to the directory containing the Debug versions of the pre-compiled libraries you downloaded earlier (e.g. in my case this would beC:\Users\cannam\Documents\Visual Studio 2008\Projects\vamp-plugin-sdk-N-staticlibs-win32-msvc\debug) and add it to the list - Under
Configuration Properties->Linker->Input->Additional Dependencies, addVampPluginSDK.lib - Under
Configuration Properties->Linker->Command Line->Additional options, add/EXPORT:vampGetPluginDescriptor
You should now be able to build the project (press F7).
In the above, it's critically important that the Debug configuration of your project uses the Debug version of the pre-compiled library folder, and the Release configuration (when you come to that) uses the Release version. If you get this wrong, your plugin will build but will crash when you try to use it!
The bulk of the skeleton plugin code is contained in the files MyPlugin.cpp and MyPlugin.h. These two files implement a single C++ class, called MyPlugin. For the sake of brevity in the tutorial we'll leave these names unchanged, but you might prefer to change them! To do so, rename the two files as you wish, and replace every occurrence of the text MyPlugin in both of them, and in plugins.cpp, with your preferred plugin class name.
The file plugins.cpp contains the entry point for the plugin library. A library can hold more than one plugin, and the job of plugins.cpp is to provide a single known public function (vampGetPluginDescriptor) which the host can use to find out what plugins are available in the library. The skeleton version of plugins.cpp just returns the single MyPlugin plugin class.
Note that it makes absolutely no difference to the operation of the plugin what its class is called, or what any of these files is called; MyPlugin is (in purely technical terms) as good a name as any. It also shouldn't matter if two different libraries happen to use the same class name. But if you have more than one plugin in the same library, they'll need to have different class names then!
3. Check that the plugin works with some test programs
The next thing to do is gather some programs we can use to test our plugin, so that we can check it built correctly, and so that we'll be well placed to test it properly when it actually does something.
vamp-plugin-tester
One host worth setting up at the start is vamp-plugin-tester, a program that tests your plugin for a number of possible problems and pitfalls. You can download this from http://vamp-plugins.org/develop.html as well; you're looking for the file vamp-plugin-tester-1.0-win32.zip. Unpack it somewhere convenient, and (for now) copy the vamp-plugin-tester.exe program into the tutorial project folder for easy reference.
We can then run the tester from the command prompt (go to the Start menu and type cmd to get the command prompt up).
First go to the tutorial\Debug folder which is where our newly built plugin lives:
C:\Users\cannam>cd "Documents\Visual Studio 2008\Projects\tutorial\Debug"
C:\Users\cannam\Documents\Visual Studio 2008\Projects\tutorial\Debug>
If you type dir *.dll, you should see Tutorial.dll, the plugin library we just built.
Like all Vamp hosts, vamp-plugin-tester understands the VAMP_PATH environment variable to tell it where to look for Vamp plugins. We need to set that, at least temporarily, to point to our new plugin in the current directory:
C:\Users\cannam\Documents\Visual Studio 2008\Projects\tutorial\Debug>set VAMP_PATH=.
And run the tester:
C:\Users\cannam\Documents\Visual Studio 2008\Projects\tutorial\Debug>..\vamp-plugin-tester.exe -a
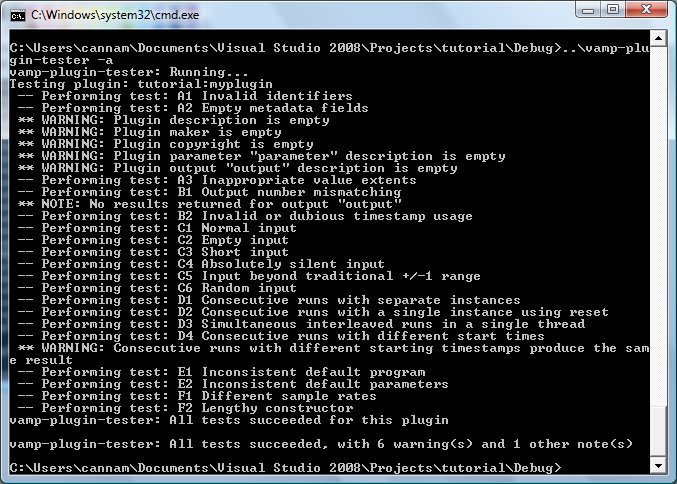
As you see, vamp-plugin-tester runs quite a number of tests -- see its README file for more details about the error and warning messages it might give. It's a good idea to use the tester right from the start of plugin development.
vamp-simple-host
The tester gives some instant feedback, but the simplest way to run a plugin and see what happens is to use vamp-simple-host. This is also part of the Vamp SDK, and is available as a binary executable in the vamp-plugin-sdk-N-binaries-win32-mingw.zip package (the "Pre-compiled library and host binaries" link on the [[http://vamp-plugins.org/develop.html|developer page]]). Extract only the vamp-simple-host.exe program from this package, and drop it into the tutorial folder as before.
We set the VAMP_PATH environment variable already when using vamp-plugin-tester.exe above, but if you skipped that part:
C:\Users\cannam>cd "Documents\Visual Studio 2008\Projects\tutorial\Debug"
C:\Users\cannam\Documents\Visual Studio 2008\Projects\tutorial\Debug>set VAMP_PATH=.
Now, with the -l option, we can ask the host to list the plugins it finds there.
C:\Users\cannam\Documents\Visual Studio 2008\Projects\tutorial\Debug>..\vamp-simple-host.exe -l
Vamp plugin search path: [.]

Vamp plugin libraries found in search path:

  ./tutorial.dll:
    [A] [v2] My Plugin, "myplugin" []

C:\Users\cannam\Documents\Visual Studio 2008\Projects\tutorial\Debug>
Huzzah. We can use this host to run the plugin on some test audio files, not just list it -- but there isn't much point yet.
4. Now, the code!
Right, let's make the plugin do something. We're going to calculate the mean power for each processing block. The work we do in this section will involve making a few edits to the MyPlugin.cpp file (and at one point also MyPlugins.h) and rebuilding the project.
The calculation we want is sum(x[i]^2) / N, where x[i] is audio sample number i, for i in the range 0 to N-1, with N the number of samples in the processing block.
Describing the input and output formats
Our calculation is a time-domain one (working directly from the PCM audio data), which means we don't need to change this function (found at line 63 of MyPlugin.cpp):
MyPlugin::InputDomain
MyPlugin::getInputDomain() const
{
    return TimeDomain;
}
We are going to write code to handle a single audio channel only, and leave it to the host to decide what to do if more than one channel is provided (most hosts will mix-down the input for us). So that means we don't need to change these functions either:
size_t
MyPlugin::getMinChannelCount() const
{
    return 1;
}

size_t
MyPlugin::getMaxChannelCount() const
{
    return 1;
}
Nothing about our calculation requires us to constrain the processing block size -- we can handle any block size. So we can leave this function unchanged as well:
size_t
MyPlugin::getPreferredBlockSize() const
{
    return 0; // 0 means "I can handle any block size"
}
The function getOutputDescriptors describes what sort of features we intend to return. As it happens, the skeleton already contains pretty much the description we are going to need: a single feature, with a single value, returned for each processing block. We should probably change the name of the output, at least:
MyPlugin::OutputList
MyPlugin::getOutputDescriptors() const
{
    OutputList list;

    OutputDescriptor d;
    d.identifier = "power";
    d.name = "Power";
    d.description = "";
    d.unit = "";
    d.hasFixedBinCount = true;
    d.binCount = 1;
    d.hasKnownExtents = false;
    d.isQuantized = false;
    d.sampleType = OutputDescriptor::OneSamplePerStep;
    d.hasDuration = false;
    list.push_back(d);

    return list;
}
Initialisation
We said that we can accept any block size -- but we do need to know what the block size is.
This is told to us in the initialise function. Looking at that function, we can see the argument is size_t blockSize. It's our job to remember the value of this.
We need to add a class data member for this. In MyPlugin.h, look for this line at line 54 (near the bottom of the file):
// plugin-specific data and methods go here
and add a line after it:
    // plugin-specific data and methods go here
    size_t m_blockSize;
Then, back in MyPlugin.cpp, find this line at line 187 in the initialise function:
// Real initialisation work goes here!
and add a line to set the data member:
    // Real initialisation work goes here!
    m_blockSize = blockSize;
Also it's very good practice to make sure the data member is initialised to zero in the class constructor. That, at line 10 of MyPlugin.cpp, initially reads:
MyPlugin::MyPlugin(float inputSampleRate) :
    Plugin(inputSampleRate)
{
}
and we want it to read:
MyPlugin::MyPlugin(float inputSampleRate) :
    Plugin(inputSampleRate),
    m_blockSize(0)
{
}
At this point it's a good idea to try rebuilding the project and make sure it still compiles.
Processing
The core of our calculation happens in the process method:
MyPlugin::FeatureSet
MyPlugin::process(const float *const *inputBuffers, Vamp::RealTime timestamp)
{
    // Do actual work!
    return FeatureSet();
}
Here inputBuffers is effectively an array of arrays -- to retrieve a single audio sample, we index it first by audio channel number (we know that we only have one channel, so the only valid index is 0) and then by audio sample number (from 0 to the processing block size less 1).
What we want to do is add up the squares of the audio sample values, and divide by the number of samples.
MyPlugin::FeatureSet
MyPlugin::process(const float *const *inputBuffers, Vamp::RealTime timestamp)
{
    float sumOfSquares = 0.0f;

    size_t i = 0; // note: same type as m_blockSize

    while (i < m_blockSize) {
        float sample = inputBuffers[0][i];
        sumOfSquares += sample * sample;
        ++i;
    }

    float meanPower = sumOfSquares / m_blockSize;

    // now what?

    return FeatureSet();
}
So we've calculated the mean power value -- now how to return it?
In Vamp plugin terms, what we have is a plugin that has a single output, on which is returned a single audio feature for each process block, with one value. We need to construct a Feature object, give it a single value, and then push it as the only feature in output 0 (the first) of a new FeatureSet object. See the [[http://vamp-plugins.org/guide.pdf|Vamp plugin API programmer's guide]] for more information about feature representation.
Here's the code:
MyPlugin::FeatureSet
MyPlugin::process(const float *const *inputBuffers, Vamp::RealTime timestamp)
{
    float sumOfSquares = 0.0f;

    size_t i = 0;

    while (i < m_blockSize) {
        float sample = inputBuffers[0][i];
        sumOfSquares += sample * sample;
        ++i;
    }

    float meanPower = sumOfSquares / m_blockSize;

    Feature f;
    f.hasTimestamp = false;
    f.values.push_back(meanPower);

    FeatureSet fs;
    fs[0].push_back(f);
    return fs;
}
After making this change and rebuilding the project, we now have a plugin that actually does something.
Returning to our command prompt, and with the aid of a suitable input file (.wav or a similar uncompressed format that vamp-simple-host understands) in the tutorial folder, we can now run it. For example:
C:\Users\cannam\Documents\Visual Studio 2008\Projects\tutorial\Debug>..\vamp-simple-host.exe Tutorial:myplugin ..\my-song.wav
vamp-simple-host: Running...
Reading file: "C:/Users/cannam/Documents/Visual Studio 2008/Projects/tutorial/my-song.wav", writing to standard output
Running plugin: "myplugin"...
Using block size = 1024, step size = 1024
Plugin accepts 1 -> 1 channel(s)
Sound file has 2 (will mix/augment if necessary)
Output is: "output"
 0.000000000: 0
 0.023219954: 0
 0.046439909: 0
 0.069659863: 0
 0.092879818: 0
 0.116099773: 0
 0.139319727: 0
 0.162539682: 1.56888e-11
 0.185759637: 4.90218e-09
 0.208979591: 2.135e-07
 0.232199546: 0.00666197
 ... and lots and lots and lots and lots more output ...
C:\Users\cannam\Documents\Visual Studio 2008\Projects\tutorial\Debug>
Try using the vamp-plugin-tester again as well.
5. Fill in descriptions and other metadata
Now we have a working plugin, but it still has the rather awkward name of MyPlugin. There are several functions at the top of MyPlugin.cpp which we can use to give it a more sensible name and description.
For example:
string
MyPlugin::getIdentifier() const
{
    return "myplugin";
}
The identifier is a string that is not normally used by people (for example, it never appears when plugins are listed in a menu of a graphical application), but that uniquely identifies the plugin within its library. Something like "power" is perfectly appropriate here.
You should fill in all of getIdentifier, getName, getDescription, getMaker, getPluginVersion, and getCopyright for every plugin you write.
In my case, I would need something like:
string
MyPlugin::getIdentifier() const
{
    return "power";
}

string
MyPlugin::getName() const
{
    return "Signal power level";
}

string
MyPlugin::getDescription() const
{
    return "Calculate the mean signal power for each processing block";
}

string
MyPlugin::getMaker() const
{
    return "Chris Cannam";
}

int
MyPlugin::getPluginVersion() const
{
    return 1;
}

string
MyPlugin::getCopyright() const
{
    return "Freely redistributable (tutorial example code)";
}