Deployment runthrough on Windows » History » Version 10
« Previous -
Version 10/16
(diff) -
Next » -
Current version
Chris Cannam, 2014-09-30 10:56 AM
Deployment runthrough on Windows
This is an example deployment on a 32-bit Windows 7 host.
See Deployment runthrough for a typical Linux deployment.
See Deployment troubleshooting for notes about Java and Tomcat versions and on things that might go wrong.
1. Obtain the current code from Mercurial repository
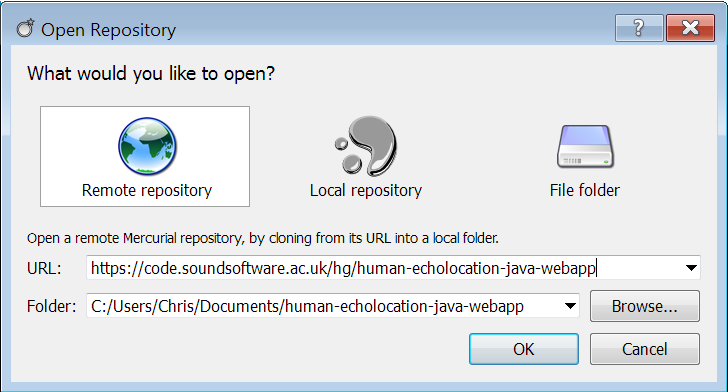
I use EasyMercurial as my Windows Mercurial client. Use "Open" -> "Remote repository" and provide https://code.soundsoftware.ac.uk/hg/human-echolocation-java-webapp as the remote repository URL, cloning to a folder called human-echolocation-java-webapp in my Documents folder. (See screenshot)
2. Install the MATLAB Compiler Runtime
Navigate to http://www.mathworks.co.uk/products/compiler/mcr/ and find the download URL. (I am using release R2013b here.) Download and run the installer, accepting its default installation path of C:\Program Files\MATLAB\MATLAB Compiler Runtime.
3. Install Java and Tomcat
Navigate to http://www.oracle.com/technetwork/java/javase/downloads/jdk7-downloads-1880260.html to download (in our case) Java 7 JDK. Run the installer and install to the default path.
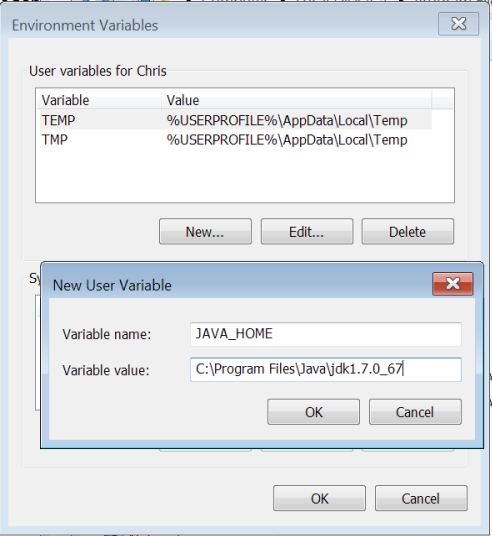
Now make sure the JAVA_HOME environment variable points to the JDK just installed, and not to the JRE runtime (this is necessary for use of the Ant build tool later). To do this, go to the Windows Control Panel, search for "environment" and open the environment variable dialog. Add a new user environment variable setting JAVA_HOME to the JDK location. (See screenshot)
Navigate to http://tomcat.apache.org/ and download the "32-bit/64-bit Windows Service installer" for (in our case) Tomcat 7. Again we accept the default path (C:\Program Files\Apache Software Foundation\Tomcat 7.0). Note that the installer asks you to set a username and password for the Tomcat administrator login -- this is optional, but it will save some configuration later if you set a password now. (See screenshot)
When installation is complete, you will be given the option to start Tomcat -- accept it. You should then be able to open the URL http://127.0.0.1:8080/manager/html in a browser to see the Tomcat manager page. You will be asked for a username and password to access it -- these should be the same ones you provided during installation.
4. Bring dependent JAR files into the webapp folder
Copy C:\Program Files\Apache Software Foundation\Tomcat 7.0\lib\servlet-api.jar and C:\Program Files\MATLAB\MATLAB Compiler Runtime\v82\toolbox\javabuilder\jar\javabuilder.jar into the human-echolocation-java-webapp folder.
5. Install Apache Ant
Ant is the tool used to build the webapp project. (One could install an entire development environment such as Eclipse, as well, but that is beyond the scope of this page!)
Navigate to http://ant.apache.org/bindownload.cgi and download the Zip archive of the current version of Ant.